Using Postage $aver for Parcels
to Prepare a Bulk Parcel Shipment
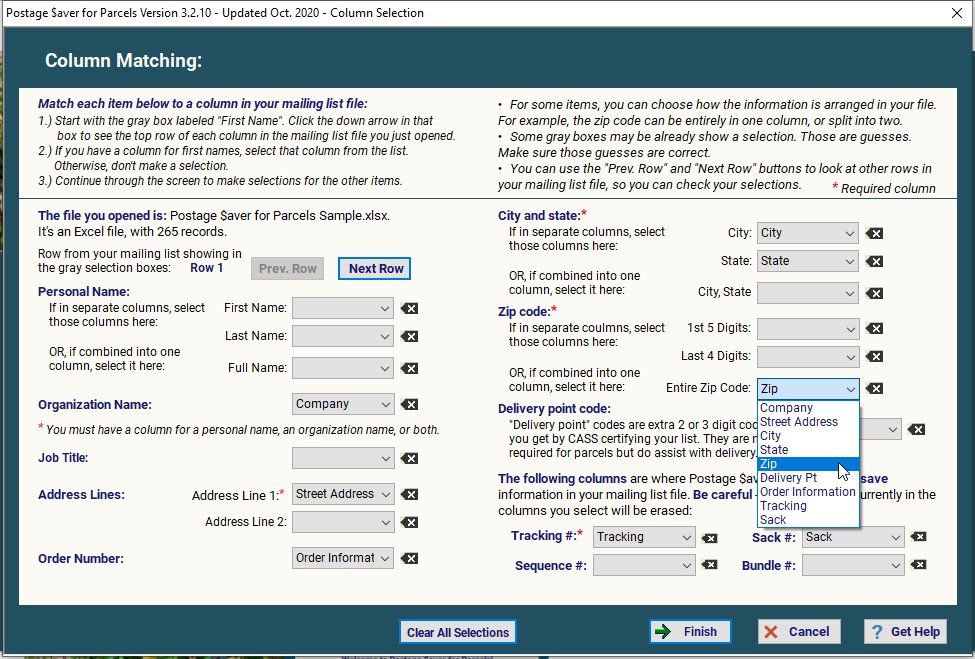
To prepare a bulk shipment using Postage $aver for Parcels, you start with your mailing list file in any common data base format, including Excel, .csv, .tab, Access, or dBase.
It doesn't matter what order the columns are in. Postage $aver for Parcels will ask you that later. Just make sure the zip code is either in its own column (like in this sample), or split into two columns for the five-digit zip and zip+4.
We provide a sample file with Postage $aver for Parcels so you can try the software without having to set up your own file.
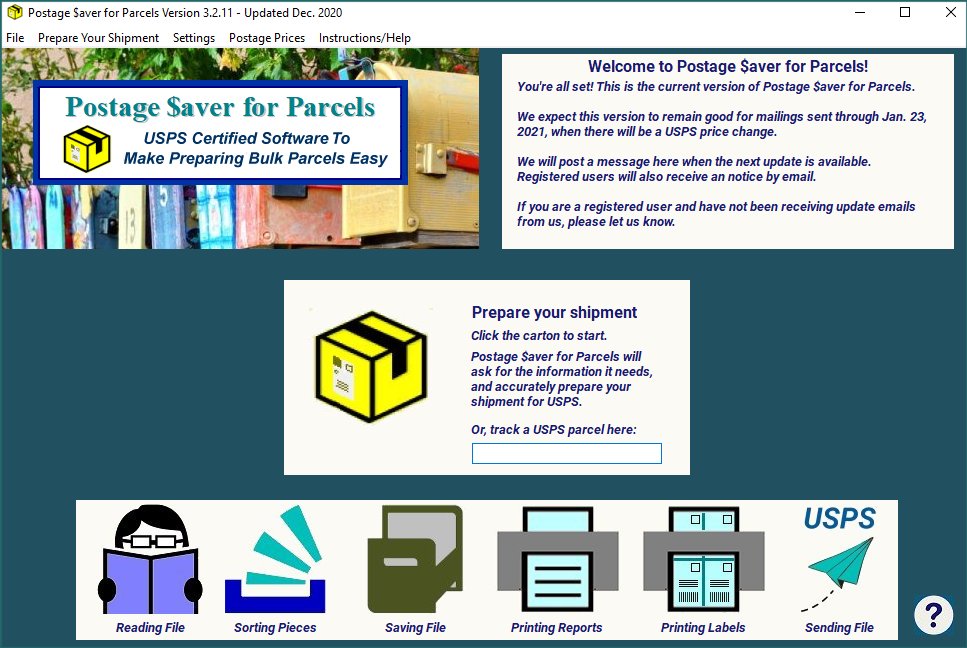
To get started, run Postage $aver for Parcels.
On the main screen, click the carton icon to run the mailing preparation wizard.
You can also track a parcel on the USPS tracking system by entering its tracking number.
Postage $aver for Parcels will walk you through several screens to ask you about your mailing, what post office you are using, and other information that it needs to correctly prepare your mailing to USPS requirements.
Each screen has a detailed help page if you need it. Just click the Get Help button.
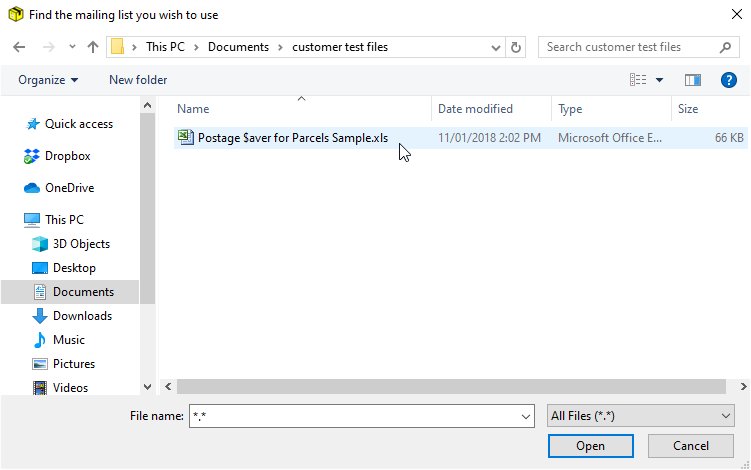
Then, Postage $aver for Parcels will ask you to select your mailing list file.
Postage $aver for Parcels will scan your mailing list, figure out how many records it has, and ask how the columns are arranged in your mailing list file.
For each column that Postage $aver for Parcels needs to read (like the "zip code" column), or save to (like the "tracking" column) you'll see a drop down menu showing all the columns in your mailing list file. Just choose the column that matches.
Then, Postage Saver for Parcels will read your mailing list and sort your shipment by sack in the manner required by USPS.
Now Postage $aver for Parcels is ready to print the paperwork you need to assemble and submit your mailing.
First, for each mailing, Postage $aver for Parcels prints a custom set of easy-to-follow instructions telling you what zip codes to put in each sack, and what label to put on the sack. The instructions and the sorted mailing list are in the same order, to make it all easy.
Postage $aver for Parcels fills out and prints the postage statement form required by USPS.
The correct statement form is automatically chosen based on the class of mail you have selected, and whether you are a commercial or nonprofit mailer.
If you are
submitting your postage statement electronically to the USPS Ship system, you can use the information on the postage statement to fill out the USPS Postal Wizard. Here's our step-by-step walkthough for
entering information on the USPS Postal Wizard.
And, Postage $aver for Parcels prints the USPS "price qualification report", that tells the bulk mail folks which zips are in each sack. For some mailings, there is also a
zone report or
weight report included, if required by USPS.
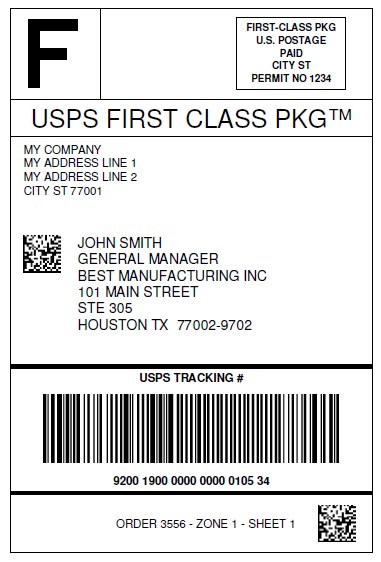
Postage $aver for Parcels prints barcoded labels for each sack on standard business card sheets, so you can just tear them off, or you can print them on plain card stock with a box around each label for cutting.
After printing the reports, Postage $aver for Parcels saves the sorted file back into the mailing list file you started with. As it does that, it adds any information you have asked for, including sack number and USPS tracking numbers.
Here's part of a mailing list file showing the sack numbers and tracking numbers added.
Next, Postage $aver for Parcels automatically prints tracking labels to USPS specifications. You can print these 4x6 labels in three different ways:
2-up on letter-size sheets;
4-up on legal-size sheets; or,
on 4x6 label rolls using a Zebra printer.
Each label includes an order number and sack number (if applicable) for fast, easy sacking.
You can print the labels in sack order, or in the same order as your original mailing list file.
You're almost there! Once you have your parcels labeled and sacked, just use Postage $aver for Parcels to automatically upload the required tracking file ("SSF") to USPS. You can then receive reports from USPS showing the progress of all of your parcels, instead of tracking them individually on USPS.com (which is also an option).
Now, print the scan form to take to the bulk mail unit so they can quickly pull up your shipment in their system. It's not required, but they will like you better if you have it. And, when they scan it, the USPS tracking system should automatically show that you've brought them your shipment.
˅ Have a question?
How can we help you?
˅ Thanks!
We'll get back to you promptly.